

How To Add Laser Effect In Photoshop
How to Create Light amplification by stimulated emission of radiation Style Light Effects in Adobe Photoshop

How to Create Laser Style Light Furnishings in Adobe Photoshop www.sleeklens.com
Hello! Today we'll be learning how to create cool Laser Light Streak Effects.
They're pretty like shooting fish in a barrel to do and one time yous have mastered the nuts you will be able to create some dramatic effects.
You practice not have to limit the shapes to what is in this Photoshop Tutorial, you tin can get where your imagination takes you, so the crazier you desire to get once you have this all mastered the better.
If yous would like to take a few minutes earlier we starting time this Tutorial so google Photoshop Light amplification by stimulated emission of radiation Manner Lite Effects for some inspiration.
I'm sure after a few minutes you will take plenty of ideas in your head so if you don't wish to only stick to the shape I create then feel complimentary to branch out, the step volition exist the exact same.
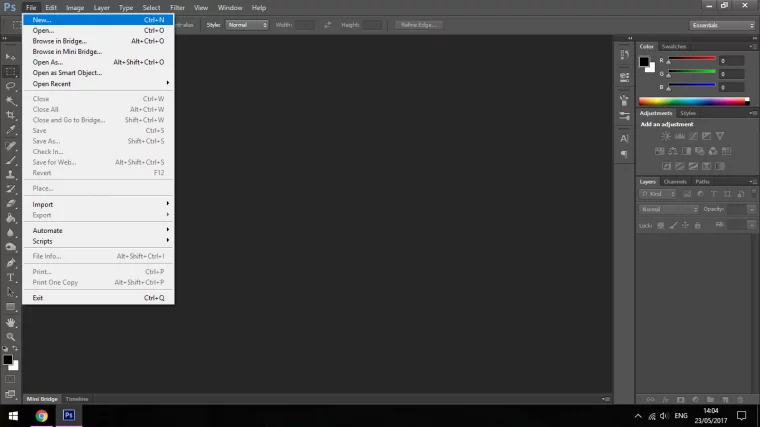
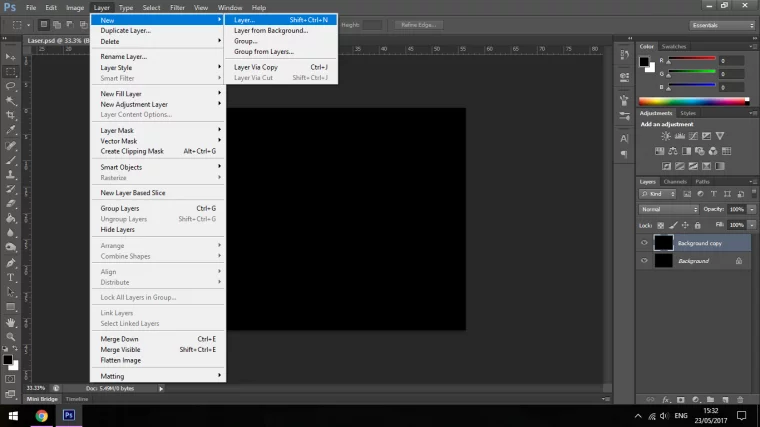
Ok so create a new Photoshop document by going to File New,
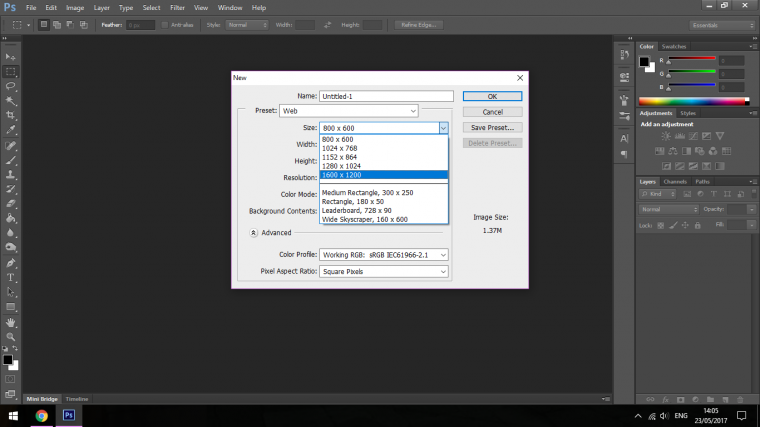
So for this, nosotros're just going to choose the Preset for Web and then brand the size 1600 x 1200
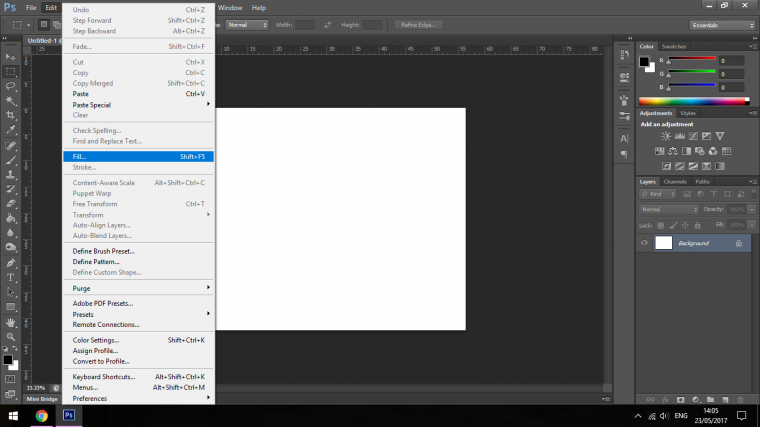
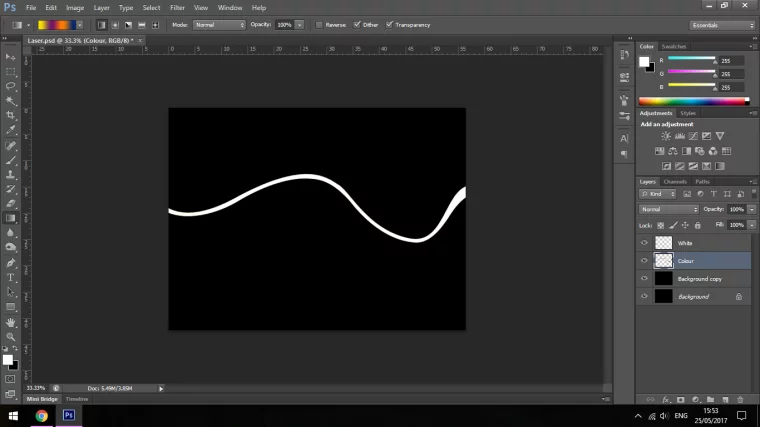
At present we'll want to Fill the Layer with Black.
That'south in Edit – Fill up (or if you lot know you're shortcuts and y'all want to be a trivial bit more fancy fundamental in Shift + F5)
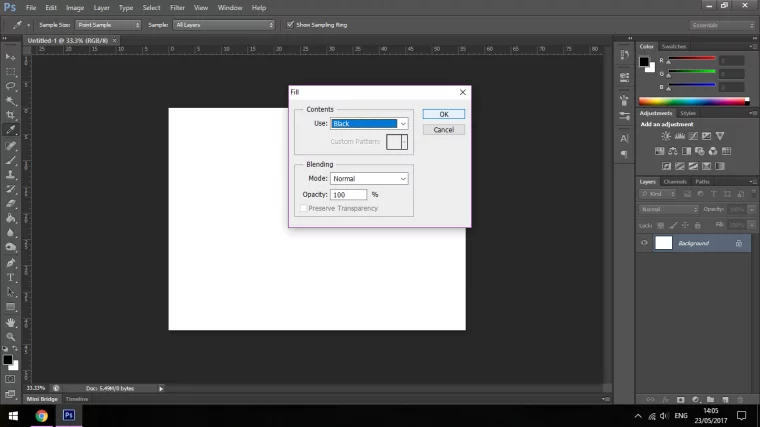
Once you have chosen Fill click on the Employ Tab and choose Blackness near the bottom.

Click Ok.
Yous will now have your bottom Layer completely filled in with Blackness.
Just nosotros simply accept to practice a couple more preparation steps before we can start.
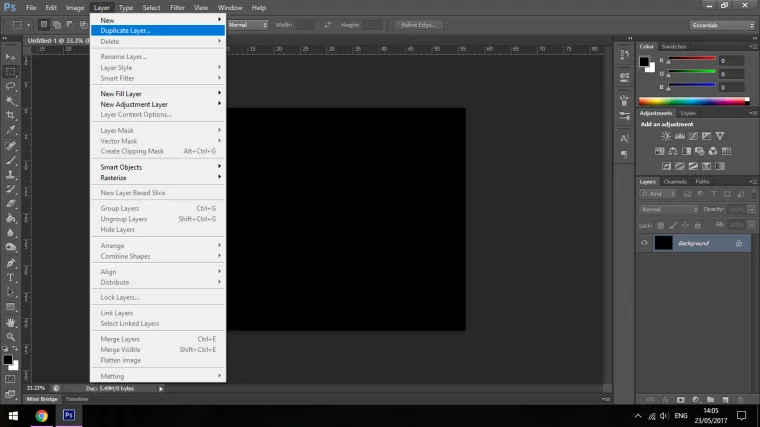
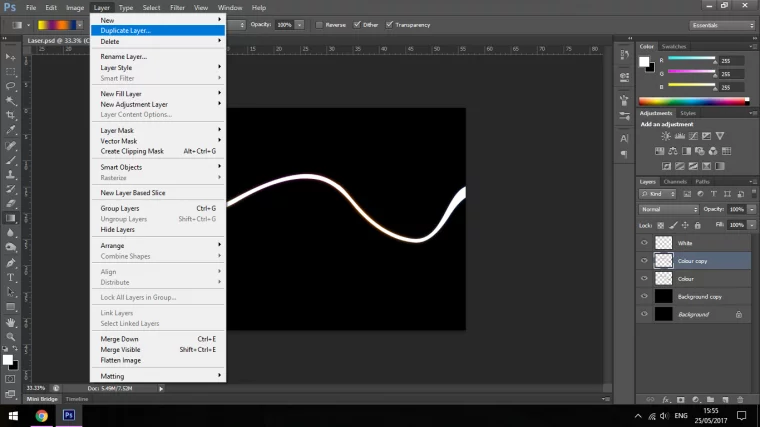
The first is to Duplicate your Layer.
Y'all find this in the Layer Bill of fare, second down.
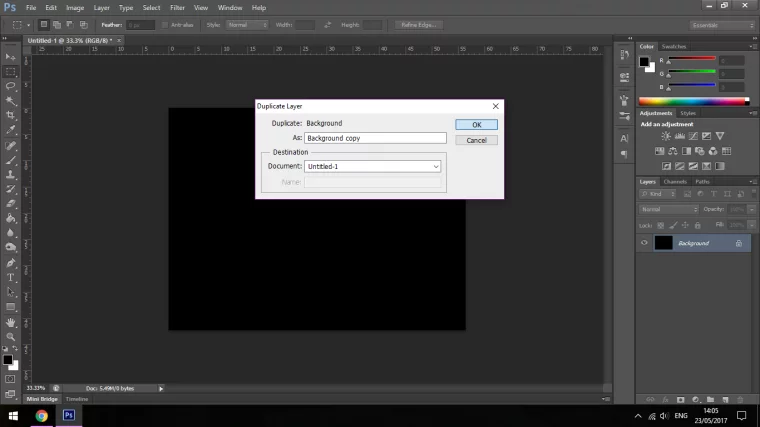
Click Ok.
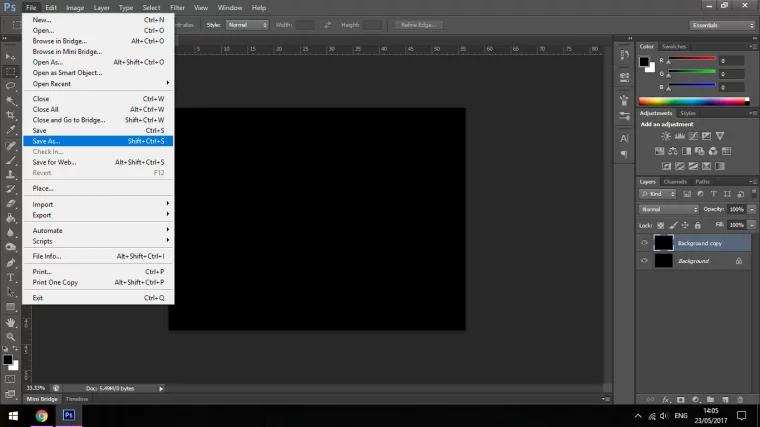
Then Save As (Shortcut – Shift + Ctrl + Southward)
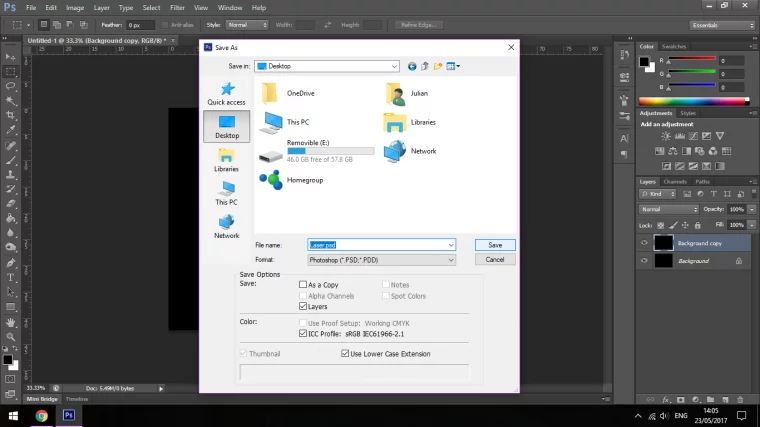
And salve your File as a Photoshop PSD File, you will observe this in the format drib downward.
Cool, we're ready to start applying some Photoshop Magic to our sail.
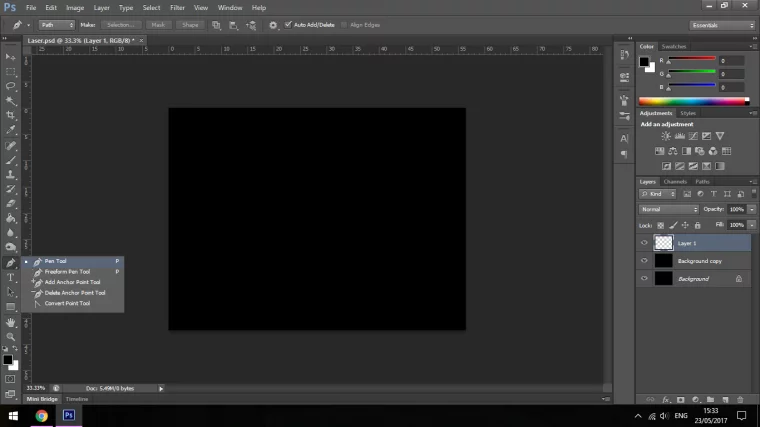
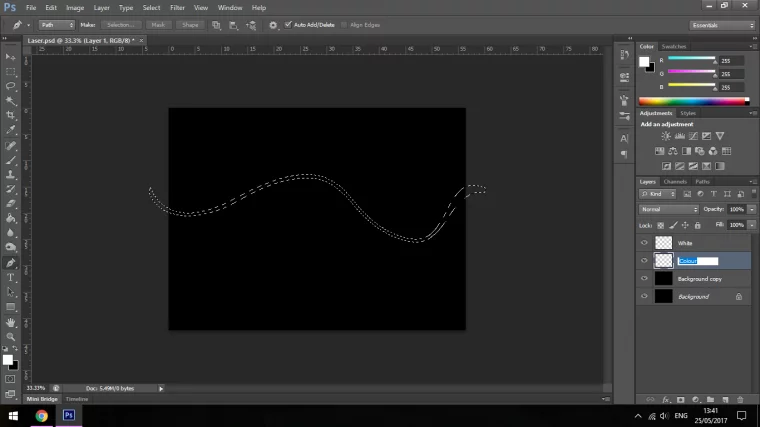
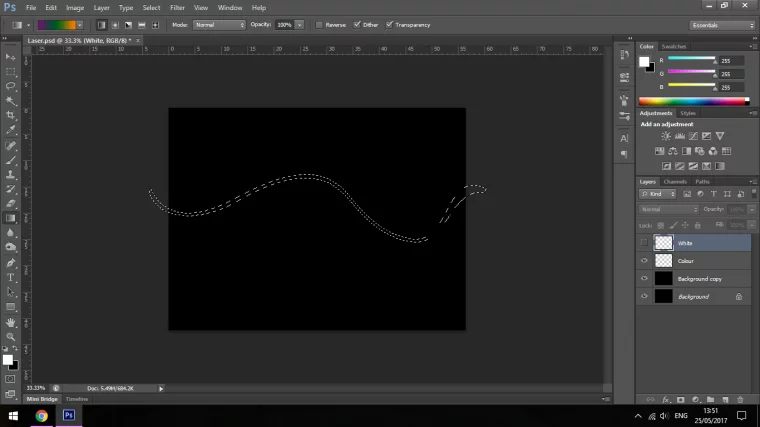
OK, so the get-go thing we'll be doing at present to create our Lite Streak is to open up up the Pen Tool.
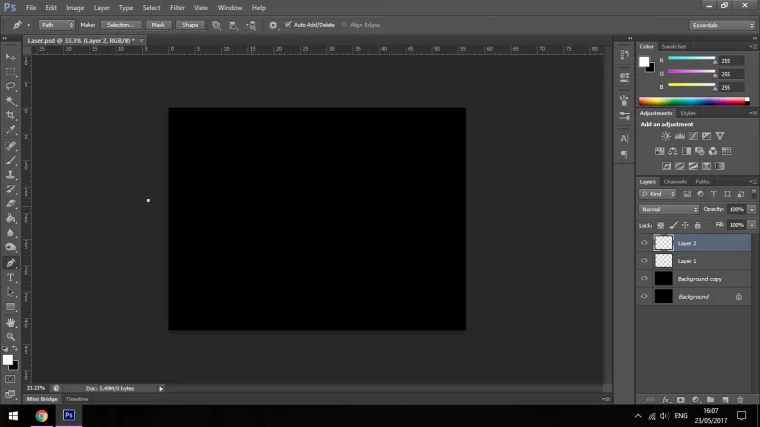
But just earlier that create a new layer.
Now Cardinal in P this will open up upwards your Pen Tool.
You lot will also run into where to find information technology in the Tools section to the left in the prototype below.
Then what we're going to do here is to create a wave Shape going from left to correct or right to left depending on what manus y'all are then once we reach 1 side of the screen we're going to do the exact same only in the complete contrary.
How y'all utilise the Pen Tool is you first of all click where y'all want to get-go.
Oh actually, create another layer, ops forgot, yous know how to don't y'all?

Anyway.
Click on the exterior, in the epitome below yous tin can run across the dot to the outside of the canvas on the left.
That'due south the first click.
Then click once more further over, agree and drag, that will create a bend.

Hold Alt and click on the dot you just did, that volition permit you first with a brand new curve, you lot don't have to do this but things can become a little crazy sometimes if you don't.
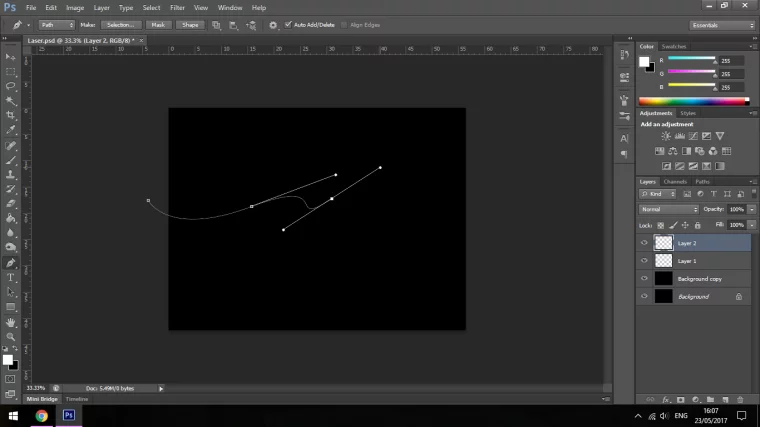
So click through and create some cool lines then nosotros end up with a dynamic curve.
Try to motion-picture show information technology in your head how you'd like the final paradigm to look like, remember at the start of this Tutorial we took a 2nd to look up some Light furnishings on Google for inspiration.
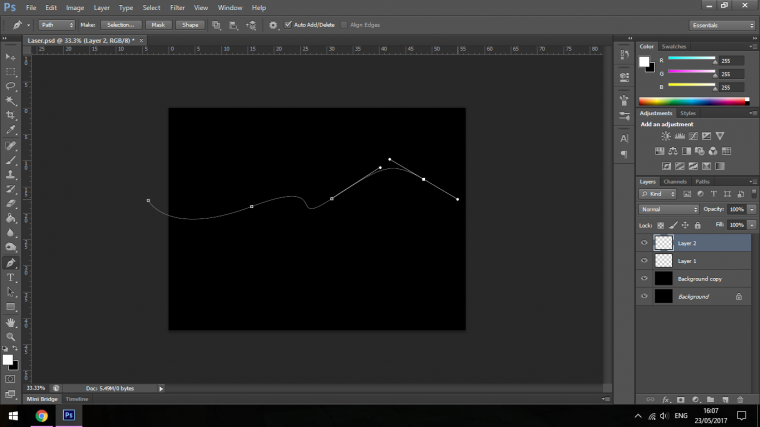
One time you have gotten from one side to the other and so you go the opposite management.
Try to follow the lines equally best y'all can until you achieve the other side again, then finally click on the very get-go dot that you created so that information technology closes off the curves.

If at this point you are confused you may need to cheque out a Tutorial on YouTube on how to apply the Pen Tool, it can be a difficult Tool to become a hang of when starting out so don't worry if it is confusing or not working for you right out, we were all at that place ourselves, information technology took me quite a while to get used to the Pen Tool.
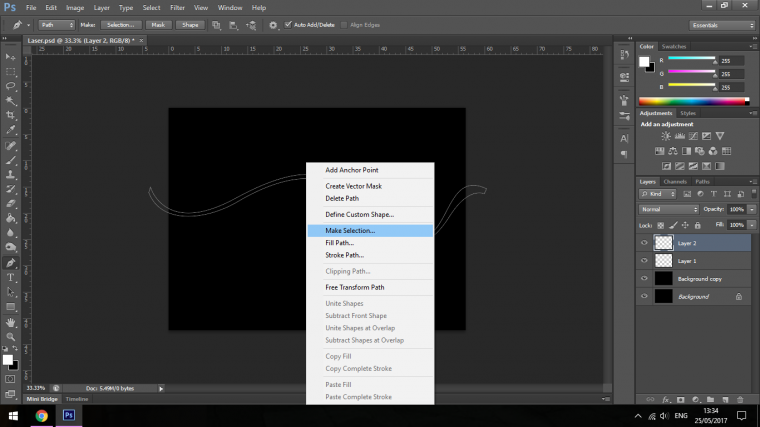
The next footstep is we will accept to make that Shape into a selection.
Annotation: If yous are coming direct from Function one you will have your shape ready if not you will take to quickly depict it out once again, unfortunately Photoshop will not save this, but it is applied if you lot expect at it from a positive point of view so it won't hurt to go a petty extra practice in with the Pen Tool since it's an awkward Tool to become used to.
So with that existence pointed out, the way to turn the shape into a selection is to right click with your mouse within the shape.
When the pop-upwardly appears, click on Make Selection.
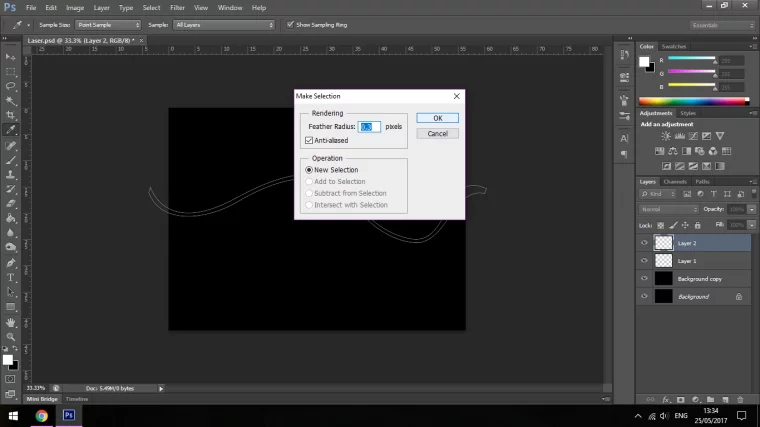
Another pop-up volition announced, as you volition see in my image below in Rendering I have changed the Feather Radius to 0.iii, you don't accept to, it won't make much of a difference, I had it like this from a previous chore so I just left it like that.
What this will do is information technology volition add a little Mistiness effectually the edges.
So if y'all're happy and so just click Ok.
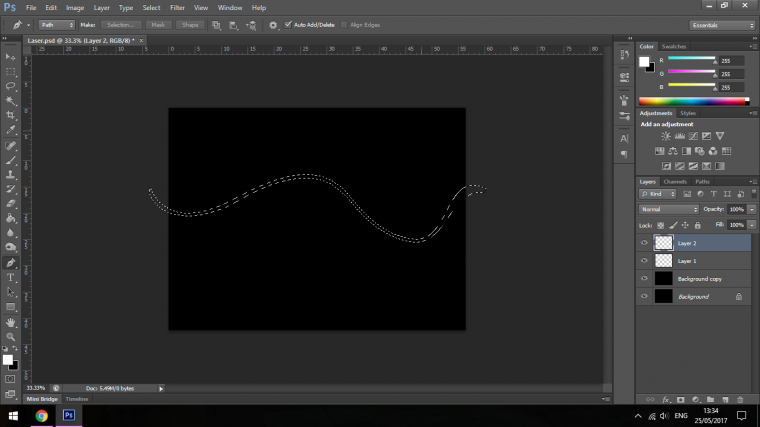
No you volition come across the Marching Ants (Selection) in full upshot and we are ready to proceed to the side by side stage.
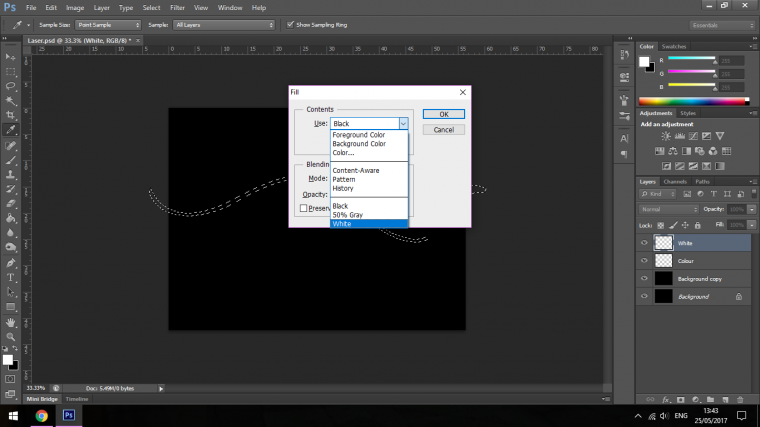
So next name the two empty Layers.
Proper name the First White and Name the Next Color.
At present Key in Shift + F5 and this will make your Fill up options appear.
Make full the White one outset.
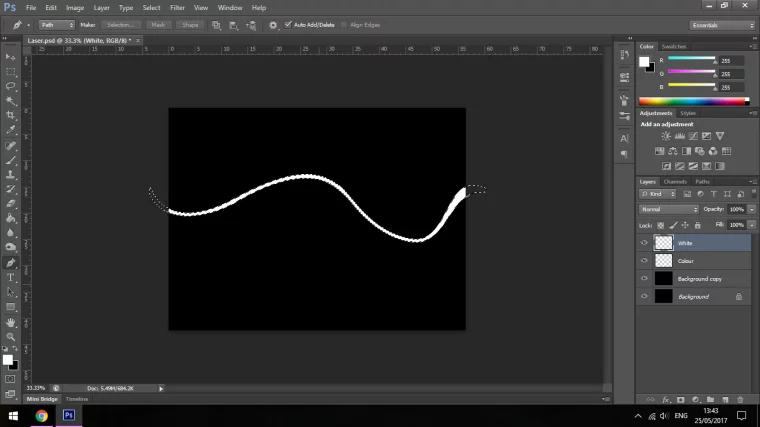
Now click the Eye Icon beside this layer to turn it off momentarily.
And click on the Color Layer.
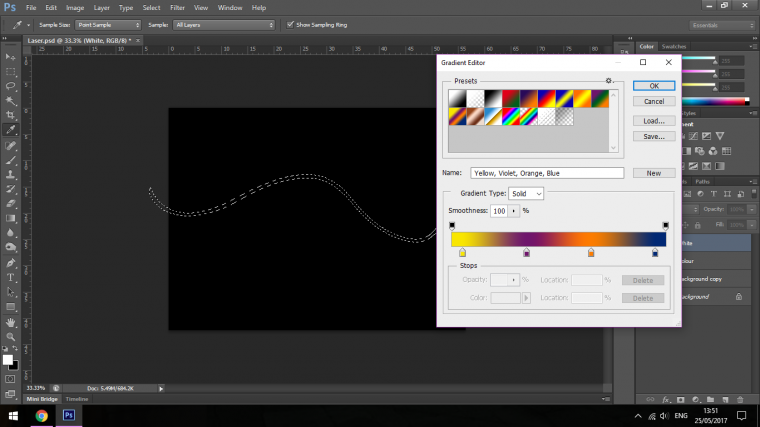
What we are going to do for this is to create a Slope.
And then click on the Gradient Tool.
You tin too activate this by keying in the Shortcut (One thousand)
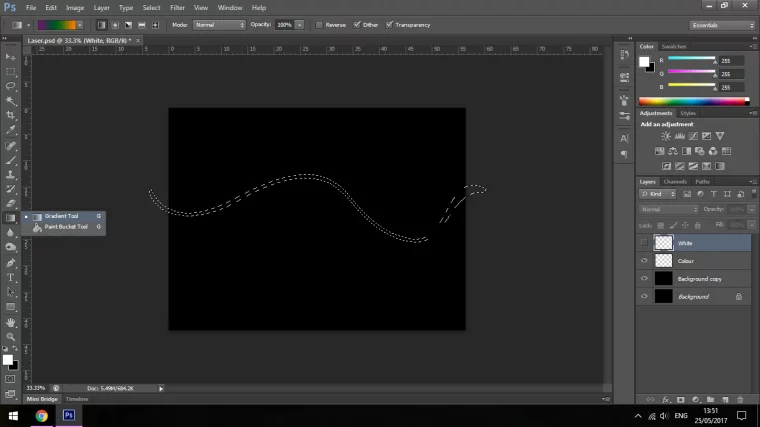
Once you take this done you will come across under 'File' and 'Edit' at the top left-paw corner a Slope Bar, double click into that and that will so open up your Slope Editor.
Choose a nice colorful Gradient, if y'all know how to create a custom 1 then, by all means, do then if not then at that place should be some nice built in Slope for you to choose from.
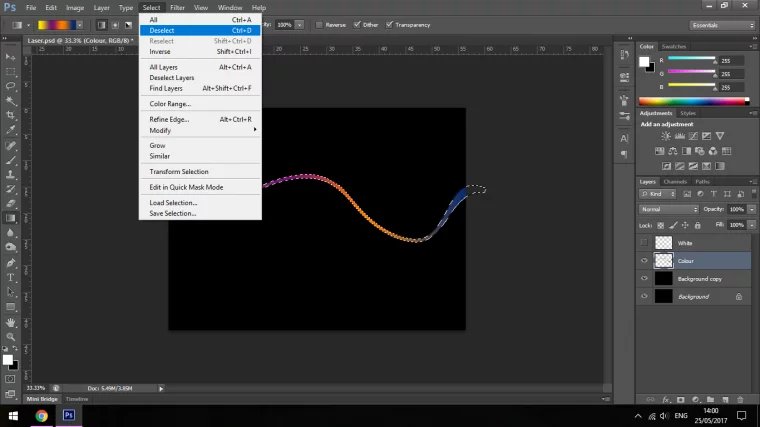
Now using your Gradient Tool, click on one side of the screen and drag across to the other, you may need to do this a few times until yous are fully happy with the results, you tin Deselect and save.
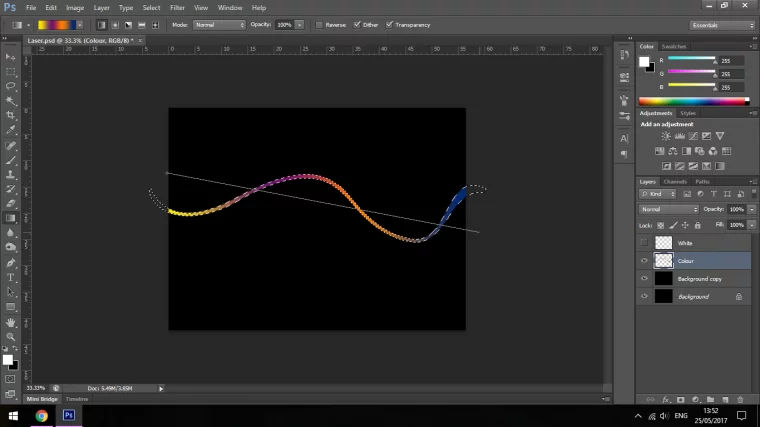
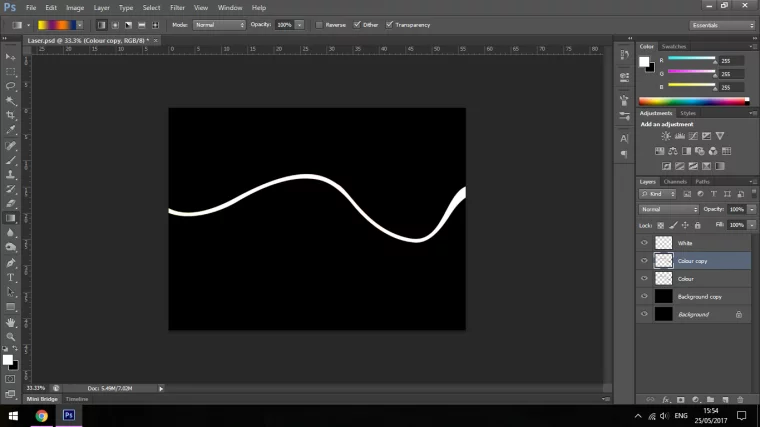
Now nosotros're set to go, click on the Colour Layer.
Become to Layer and choose Indistinguishable Layer.
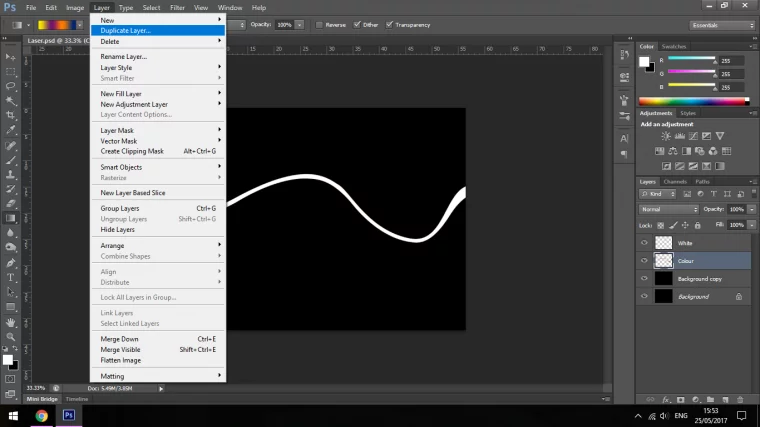
You volition now see that in that location is a copy of that Layer.
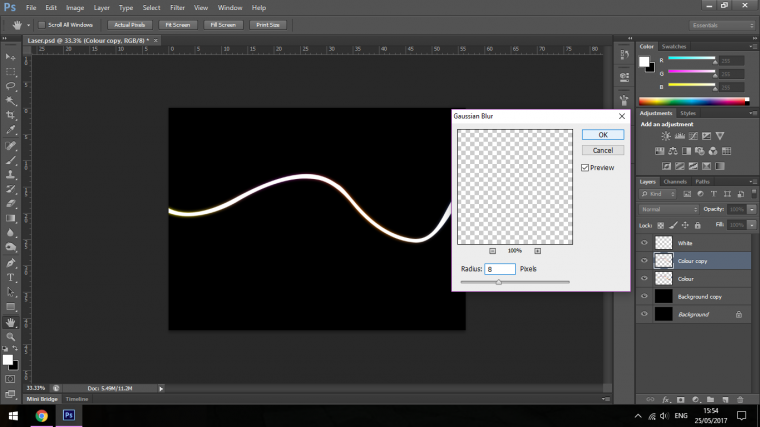
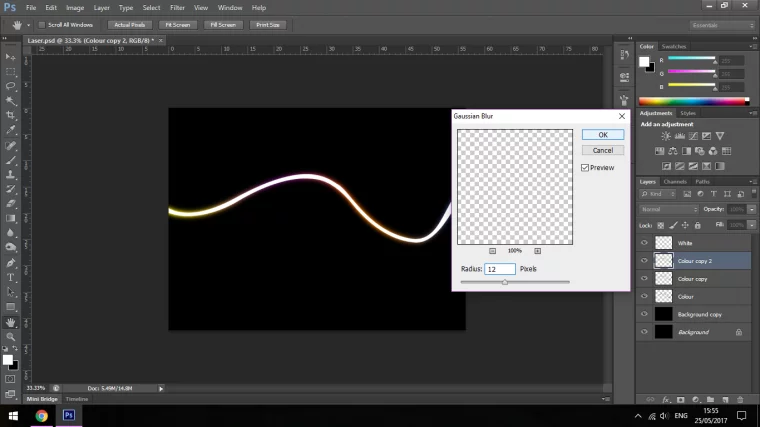
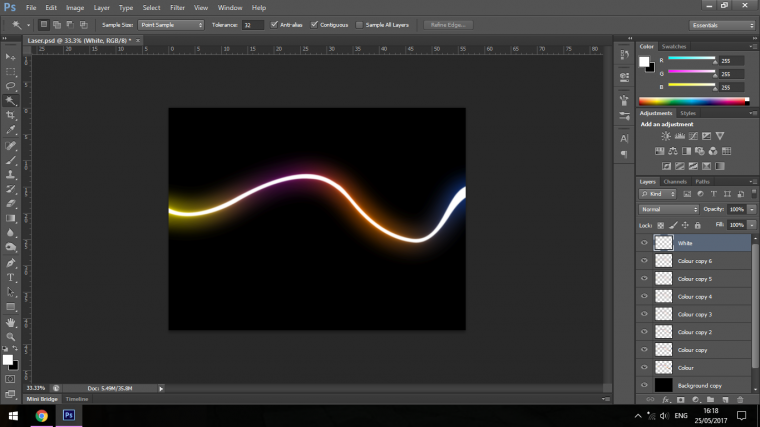
Now we're going to start playing around with the Blur Tools.
Get to Filter – Blur – Gaussian Blur

Upwards the Radius until you start to see a slight Blur hanging out the sides of your White Layer.
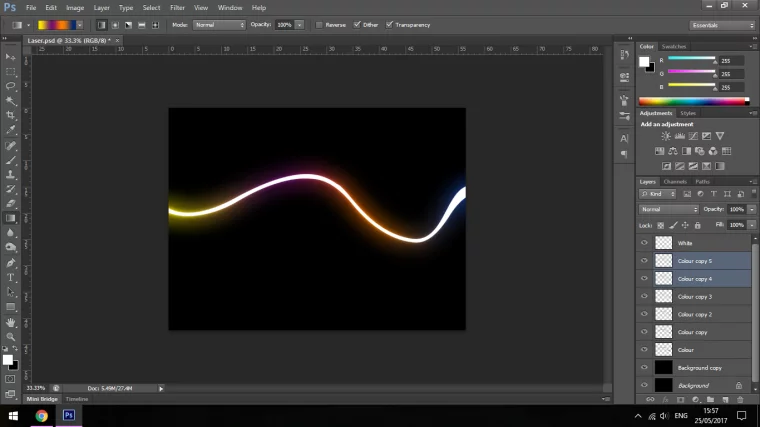
Then you'll want to Duplicate that Layer and once again apply a Gaussian Blur merely go slightly more this time.
Then Repeat, Repeat and Repeat a few more times following the last step until you start to run into a pretty convincing glow on the exterior of your White Layer.

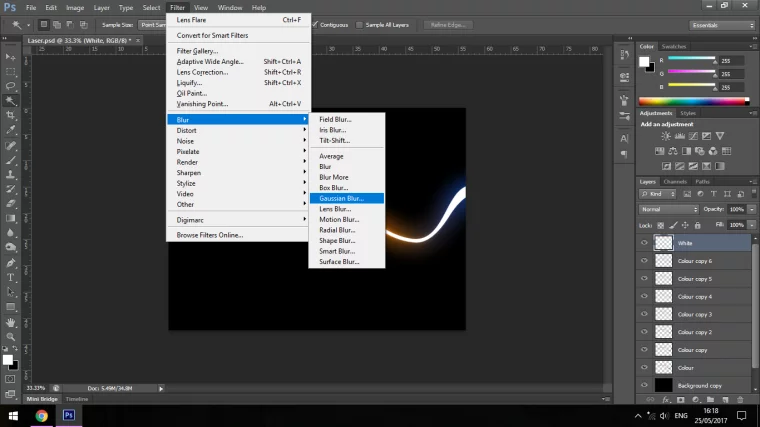
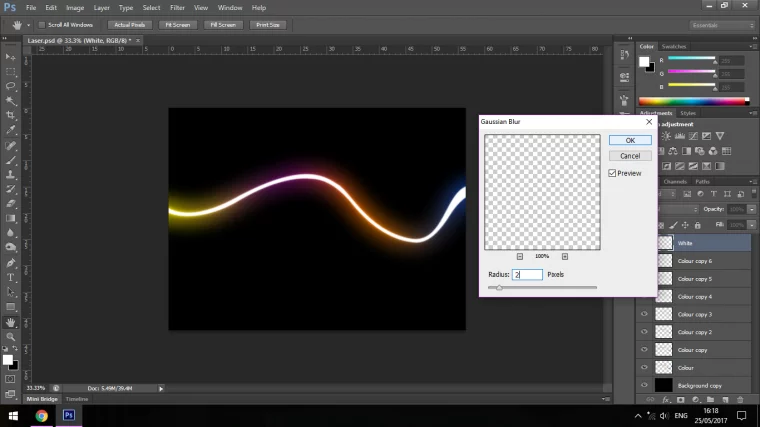
Now with the White Layer, we're going to effort to smooth information technology out a piffling, it is at this betoken still a trivial too sharp, and so become to Filter Blur and so Gaussian Blur and give it a piddling Blur, perhaps a Radius of 2.
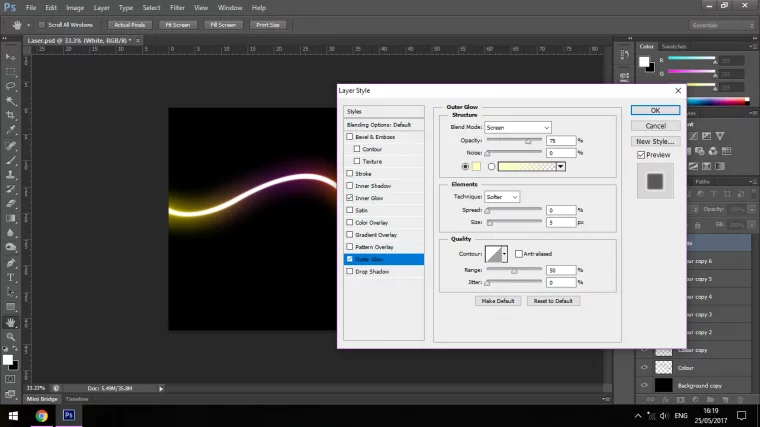
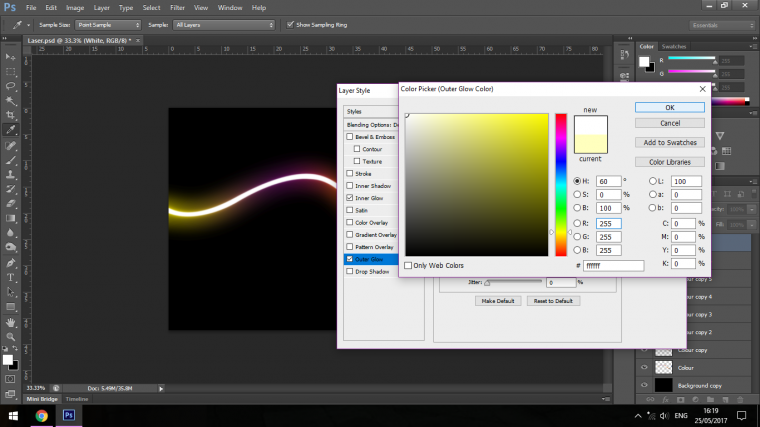
At present, double-click on the layer to open your Layer Styles, we're going to use the Inner and Outer Glow effect on this.
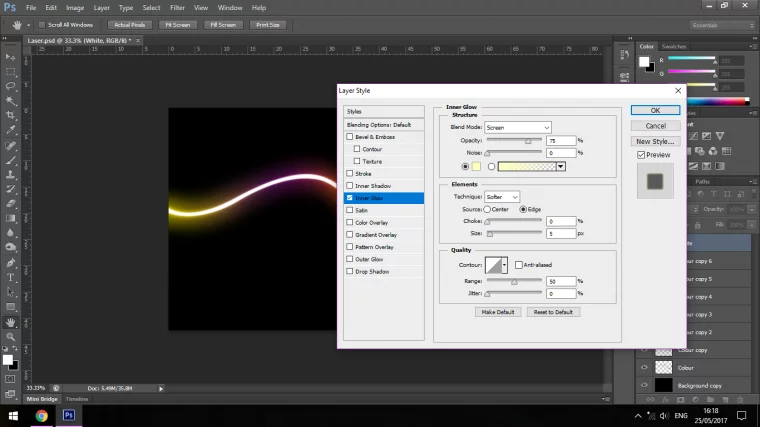
Change the colour to White, yous will encounter this nether Noise, the box will exist a yellow color, double-click in there to open up your colour options then cull White.
You can play effectually with the settings but something similar to what I have volition be fine.
You lot won't notice this effect too much.
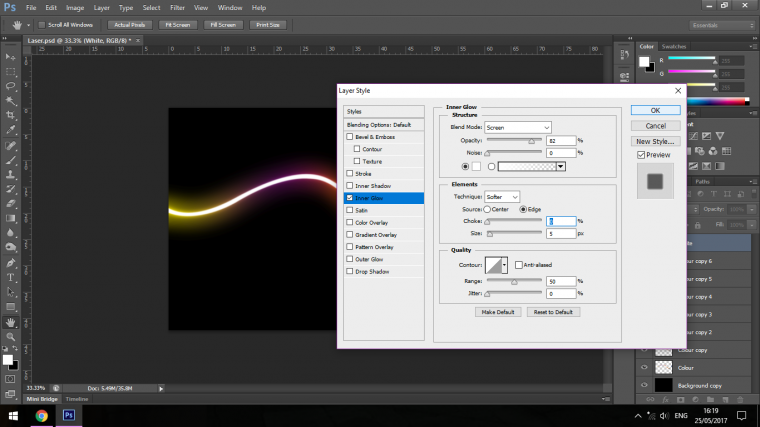
Now do the verbal same with the Outer Glow, you'll find this a little bit more so endeavour to keep it looking natural.

At present the last footling touch I'1000 going to give this is to add a Lens Flare.
Choose your Blackness Background copy then follow the steps in the images below.
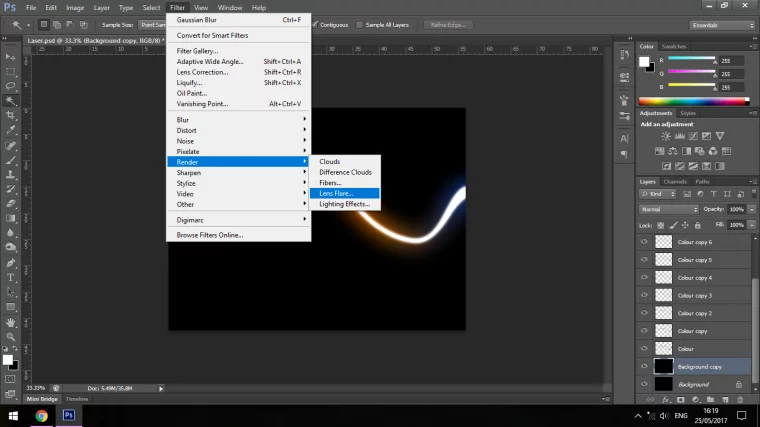
Position it.
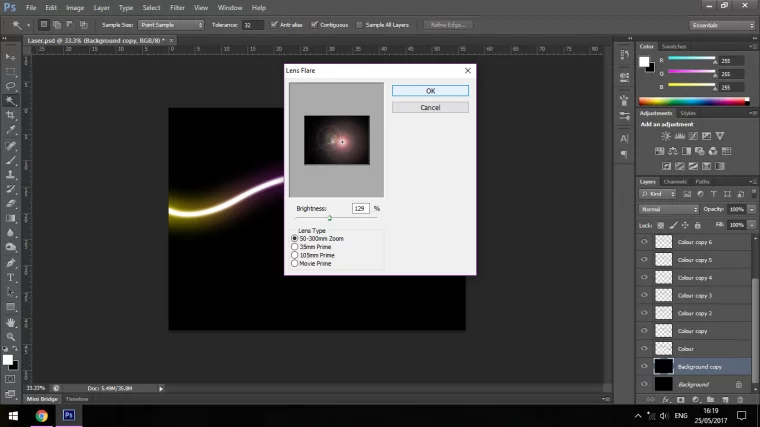
Then with Ctrl-T yous will open up up the Free Transform Tool and move information technology to where it would be best suited.
Drop the opacity to it looks more natural.
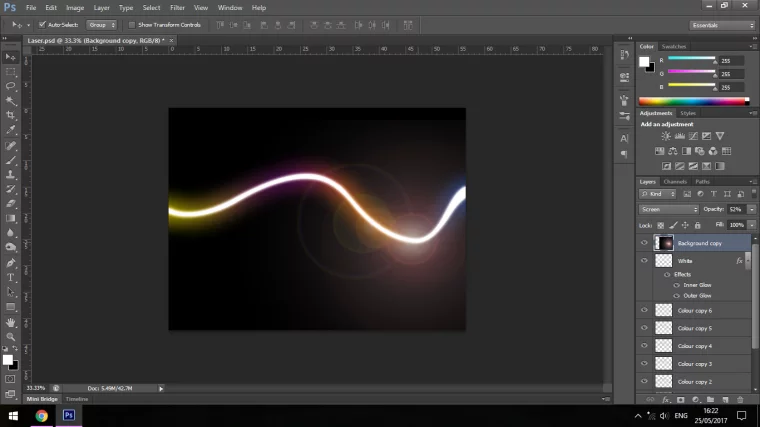
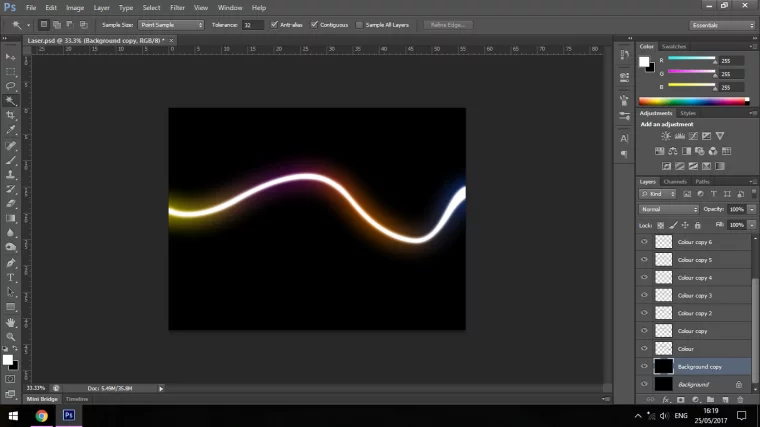
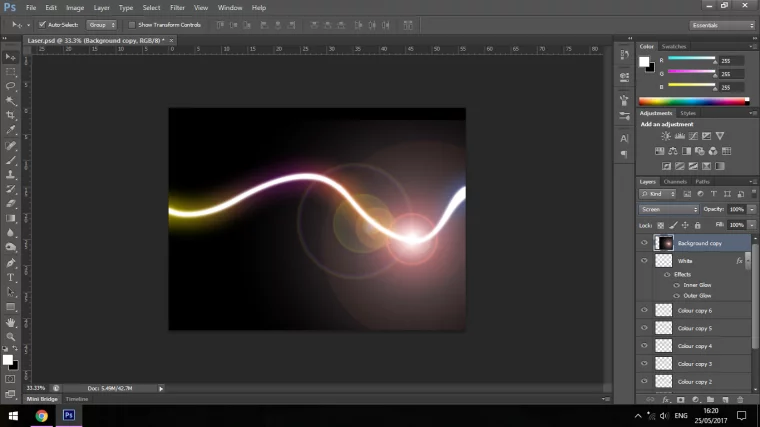
And past now you should take an image that looks similar to mine beneath, you can relieve information technology and if you desire to utilize information technology you tin copy and paste information technology into your images and utilize the Screen Blend Style to hide the Black.

Hope y'all learned a lot.
The following ii tabs change content below.
- Bio
- Latest Posts
Graduated from college in 2002 with a caste in Fine art & Design, I started exploring my way in Graphic Pattern and Professional Mail Production. Full-time freelancer since 2011.
Source: https://sleeklens.com/blog/photoshop-tutorials/how-to-create-laser-style-light-effects/
Posted by: kerrdegras.blogspot.com
0 Response to "How To Add Laser Effect In Photoshop"
Post a Comment